![[Multi-Purpose] Header (EN)](https://help.i-retail.com/wp-content/uploads/2023/11/help-center-1.png "[Multi-Purpose] Header (EN)")
An online store is an online sales channel that is ready for a quick launch. You take a ready-made template, visually customize it to your needs, add your products, and select the necessary payment methods.
Online store
1.1. How to start
For registration, enter your email, and invitation code (if available), and choose your status (investor or franchisee). Choose a working model and confirm your email. Fill out your profile and select your interests. Depending on your chosen interests, you will receive instructional emails about the platform.
If you forget your password, you can always recover it. A verification code will be sent to your email and phone number.
After registration, in your account, you can create multiple companies with different currencies and settings. To add a new company, click “Add Company” in the left menu.

To log out of your account, hover over your profile and click on “Logout.”

Create the personal account in i-Retail now
FAQ
Not yet, one account should be signed up per phone number
Yes, you could change your data like name, surname etc if it is needed
No, you can create multiple companies within one account and switch between them.
1.2. Setting up, the roadmap of the start
Placeholder
1.3. Assortment: editing, adding products, inventory management, and receipts
Add your assortment to start selling it. This can be done manually or automatically.
For an online store, it’s especially important to present your products attractively. Pay special attention to photographs, and text descriptions, and include a link to reviews.
Assortment import and export automatically
Not to creating all products manually, you can use the assortment import feature. You can also smoothly transfer your assortment from another platform to i-Retail.
To do an import, download all your product items from another platform in one of the formats supported by i-Retail (YML, XLS, CSV, and CML). Then, download the i-Retail assortment template, which is available when you click the “Import” button. Transfer your assortment into the i-Retail template. To ensure everything loads correctly, follow the structure and do not delete columns from the downloaded template.
Subsequent changes to the assortment can also be made through imports. To do this, click “Update Catalog.”

All information about catalog operations can be viewed in the “Report of file indexing” menu. If an operation has an “Achieved” status, it means the import or export was successful without errors.
Adding Products and Categories
To manually add items, start by creating categories, and then add your products and services to them. You can also create products and services without categories, and they will be added to the root of the assortment catalog.
If you have a large number of items, you can also import them using a file, which can save you time.
Categories are created in the personal cabinet in the “Catalog” menu → “Categories” → “Create Category.”

The first category is created at the root of the catalog. Subsequent categories can be created either at the root or inside another category (subcategory). By default, each category is displayed in all sales channels. To stop a category from being displayed in the online store or application, toggle the “Display category included in the catalog” option off.
To edit already created categories, select the desired category in the “Categories” menu → click “Delete” or “Edit.”

Products and services are created in the personal cabinet in the “Catalog” menu → “Products and Services” → “New Product/Service.”
Currently, there are five types of products: ordinary goods, low-alcohol products, alcoholic products, technical card, and service.
This type of product is suitable for standard items such as a T-shirt, smartphone, juice packaging, and so on.
In some countries, the sale of alcoholic products is regulated by special laws and regulations.
A technological card is used to create a composite product, which is a single item made up of multiple component products that are sold as a whole.
What else is important to know about this type of product:
- A composite product can have its own price, which does not necessarily need to be equal to the sum of the added component products.
- Working with a technical card cannot be done through file import and export; it must be done manually.
- When creating it, you can choose how it interacts with inventory management – whether the quantity of component products decreases after the sale and return of the composite product. In other words, whether the stock of component products decreases after the sale of the technical card.
- A technical card can include other technical cards. For example, you can create a large set consisting of several composite products, resulting in an overall composite product that also contains several composite products within it, such as a set consisting of a burger, pizza, and coffee.
- Technical cards can include components with modifiers. For example, a hamburger. To ensure that the cashier or self-service kiosk prompts the addition of French fries to the burger, it is recommended to add it as a composite variable item. This way, the option will be presented to the cashier or customer during purchase, and inventory management will be handled correctly.

Вы можете выбирать очередность товаров-компонентов, чтобы удобно группировать однотипные позиции в тех. карте или выводить в верхней части наиболее часто изменяемые параметры.
Изменение очередности происходит с помощью стрелок «вниз» и «вверх» в карточке тех. карты.

The main characteristic of this type is that services are not accounted for in inventory. A service can have no measurement units or can be measured in units such as pieces, hours, or minutes.
- Sales Channels
Products can be set to be available in specific sales channels. For example, one item may be intended only for the online store, while another may be available at a physical store or self-service kiosk. - Localization
You can provide descriptions, names, and FAQs in other languages so that the correct content is loaded when the language is switched in the application - Vendor code
It is a mandatory field that allows you to search for products in your personal cabinet and in cashier applications. - Description and FAQ
The editor supports various text formatting options and allows you to insert images via a link. In the description, you can write product specifications, while in the FAQ section, you can include cashier prompts or answers to frequently asked questions. For instance, for complex equipment, you can specify delivery times, dimensions, and power consumption. - Keep account of good in warehouse
If this feature is enabled, you can manage inventory for each product, including receiving items in stock, checking item stock levels, and conducting inventory audits. - Allow the sale of goods in the absence of stock
By default, when inventory management is enabled, you cannot sell more items than you have in stock. To allow sales when an item is out of stock, you can enable this function. - Photos
Images attract attention. If you use an online store and/or self-service kiosk, consider adding several vibrant photos of the product. - Link to video review
You can insert a link to any video resource where your content is hosted, such as YouTube - Modifiers
Modifiers allow you to create product variations. For example, for T-shirts of different sizes, you don’t need to create separate products; you can add sizes as modifiers, set prices, and assign unique vendor codes. - Buttons for buying in the online shop
You can customize the name of the buy button for each product in the online store, replacing the standard “Add to Cart” text with any other text you prefer.

Editing the assortment
To make changes to your assortment, go to the “Catalog” menu and then select “Goods and Services.” Next, access the settings of the item you want to adjust. You can either click on its name, highlighted in blue, or click on the edit button.
If you want to increase or decrease prices or temporarily reduce prices for items during a promotion, you can adjust the amount in the “Base Price” field in the item’s card. This is the price visible to customers. If you need to make a specific item free for customers, you can set its price to zero.
After making changes, don’t forget to click “Save” and then confirm the changes by clicking “Yes” in the pop-up window.
If you are working with a file, upload the updated version to your personal cabinet, and the changes will be applied according to the updated data. Items that are not in the file will remain unchanged.
1.4. Orders, statistics, returns
All sales data is accessible in your personal cabinet. You can view both summarized information and detailed information for each of your orders. This allows you to monitor and analyze your sales performance effectively.
Orders
Information about all orders is displayed in one place, and you can view it in detail in your personal cabinet under the “Orders” menu. To see detailed information about an order, click on “Details.” This allows you to access order-specific details and manage your orders effectively.

You can also set up filters to find specific orders easily. You can filter orders by purchase date, by a specific location (if you have multiple), and by order status (e.g., paid, returned – if the item was not issued for some reason). This filtering helps you efficiently manage and track your orders based on various criteria.
After a purchase, customers can receive a link through which they can leave feedback or reviews about the service. You will be able to see their feedback by accessing the order details. This feature allows you to gather valuable customer insights and assess the quality of your service.
Return
If you need to process a refund for an order, open the order and click on “Refund.” Then, select the refund amount, which can be the full amount or a partial refund.
You also have the option to manually change the order status to “Paid.” This is useful when you have a pickup point or an offline location. For more detailed information on this process, you can refer to the documentation provided by your platform or software provider.

Statistics
Reports are a valuable and convenient tool for business statistics. Some reports can be exported to XLS and CSV files.
The most useful reports for monitoring the operation of a corner store include:
- Top-selling products: This report helps you understand which specific beverages are selling best and which ones are performing poorly.
- Sales and profit report: This report provides insights into your sales levels and expected revenue for a selected period.
You can access other reports in the “Reports” menu, which can provide additional insights into your business performance.
1.5. Hardware
Placeholder
1.6. Marketing
Placeholder
1.7. Payments – plan payment, balance, withdrawal
Plans, payments
To view your subscription plan, you can access it in your personal cabinet in the “Tariffs” section at this URL: https://my.i-retail.com/main/subscription/tariff
Invoices for your plan payments can be found in the “Invoices” section. To make a payment, click on “Pay,” and a payment page will open for you to complete the payment for the invoice.
Alternatively, you can top up your balance in your personal cabinet, and the tariff fee will be deducted from this balance. You can add funds to your balance within your personal cabinet on the balance page.
")
Balance, Withdrawal of Funds
Withdrawal of funds occurs in a different place, not in the personal cabinet. To withdraw funds, please follow these steps:
- Go to the following link: https://agent.i-retail.com
- Log in using the same username and password you use for your personal cabinet.
If you see the message “Request verification…” at this stage, you can ignore it as it does not affect the withdrawal of funds.
- Open the top menu and navigate to the “My Profile” section.
- Scroll down the page and switch to the additional profile.
- Enter the withdrawal amount, if necessary, fill in the details, and click on “Withdraw.”
- The funds will typically be processed within 1-2 days.
This withdrawal process depends on the country where you are operating, so please align the appropriate procedure with our supoort.
1.8. Technical Setup (Domain, Integration of Third-Party Services)
If you are preparing your website for launch or it is still under development, you can temporarily close the store by toggling the switch in the general settings. This feature allows you to restrict access to your store while you work on it.
Domain
Every website on the internet has its own unique domain. The address of your store (URL) is the web address or link to the page where your store is located.
Every i-Retail store comes with a free subdomain like “yourstore.i-retail.com” with free hosting. You can either use the free subdomain or purchase a new domain from a third-party provider or connect an existing domain you already own. Hosting always remains free.
To connect your own domain, you will need to configure DNS, which is a feature that can be easily set up with any domain provider.
Online сhats and web analytics
You can integrate online chats and analytics systems (such as Yandex.Metrica and Google Analytics) with your online store.
Online Chat
To allow customers to contact you via chat directly on your website, you can integrate an online chat service (like JivoSite and others). To make the chat work on your website, simply copy and paste the code generated by the online chat service into the designated field in your i-Retail dashboard.
This integration will enable real-time communication between you and your customers on your website.

Web Analytics
Web analytics services provide insights into the age, gender, interests, and more of your website visitors. To integrate such a service, you can copy and paste the code generated by Yandex.Metrica or Google Analytics into the designated field in your i-Retail dashboard.
These analytics tools help you understand your website’s audience, track user behavior, and make data-driven decisions to improve your online store’s performance.
Instructions for setting up Google Analytics can be found on their respective websites.
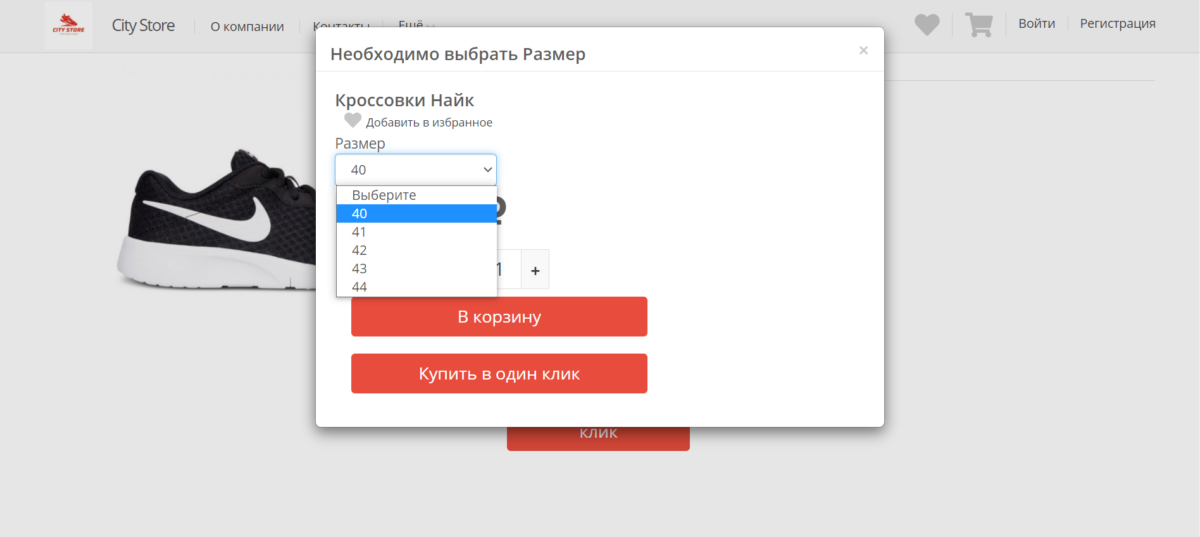
Custom buttons’ names
Name for button “Buy in one click”
This feature allows customers to quickly place an order. Order details will be sent to the customer’s email, where they can proceed with the payment for their purchase.
Name for the Add to Cart button
If you want to change the names of buttons in your online store, specify “custom” names for them. After specifying the name, the purchase buttons will change for all products.

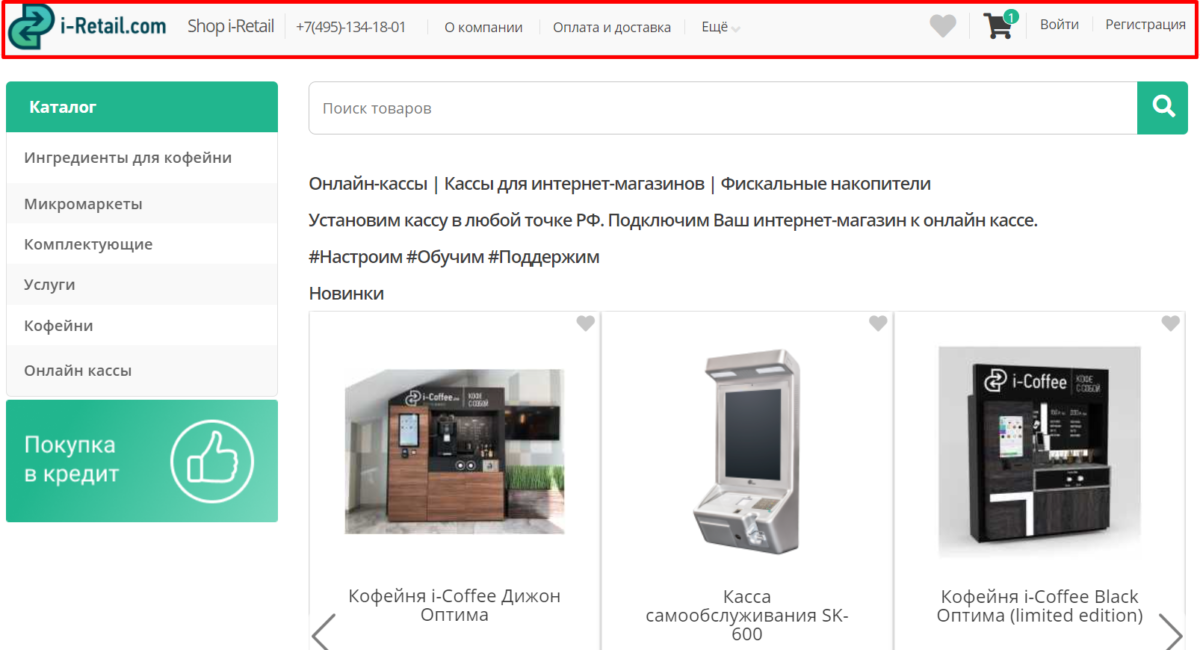
Shop contacts
Add as many contact methods as possible, as well as the company’s social media profiles. They will be visible in the footer of the online store.

Promo-text and SEO
Configure SEO settings to promote your online store in search engines. For more detailed information about fields and their settings. You can also close your store from indexing, which means it will no longer be indexed by search engines and won’t appear in search results.
The promo text is displayed on the main page of the website, typically used to provide a description of the online store. The text editor supports various formatting options and allows you to insert images.

Configuring the Authorization Form and Registration
To place an order, customers will need to register on your online store. You can customize and choose the required fields for registration yourself.

There are 3 types of settings:
- In Registration: (Displayed during registration in the form)
- Required Fields: (Mandatory for filling out during registration — marked with an asterisk)
- In Profile: (Will be requested from the user after registration)

Additional order fields
You can configure additional fields based on your needs and the specifics of your online store. For example, these could include fields for email confirmation, a checkbox for agreeing to the processing of personal data, or consent for receiving marketing materials.

1.9. Visual Customization (Content, Blocks, Pages, Color Scheme)
Content settings
Logo and Favicon
It’s best if they are the same. The logo is displayed on the website, while the favicon appears in search results.
Color Scheme
The color scheme determines the colors of buttons and parts of the interface.
Comment Field Title and Comment Field Placeholder
If the order comment feature is enabled, you can customize the title and text in the comment field.

Cart Sharing
Users can share their shopping carts. Sharing can be done on social media, sending a link to the created cart via email, or simply copying the cart link.
In addition, a company manager can assemble the necessary products from the store’s assortment, add them to a cart, and share the cart’s link with the customer.

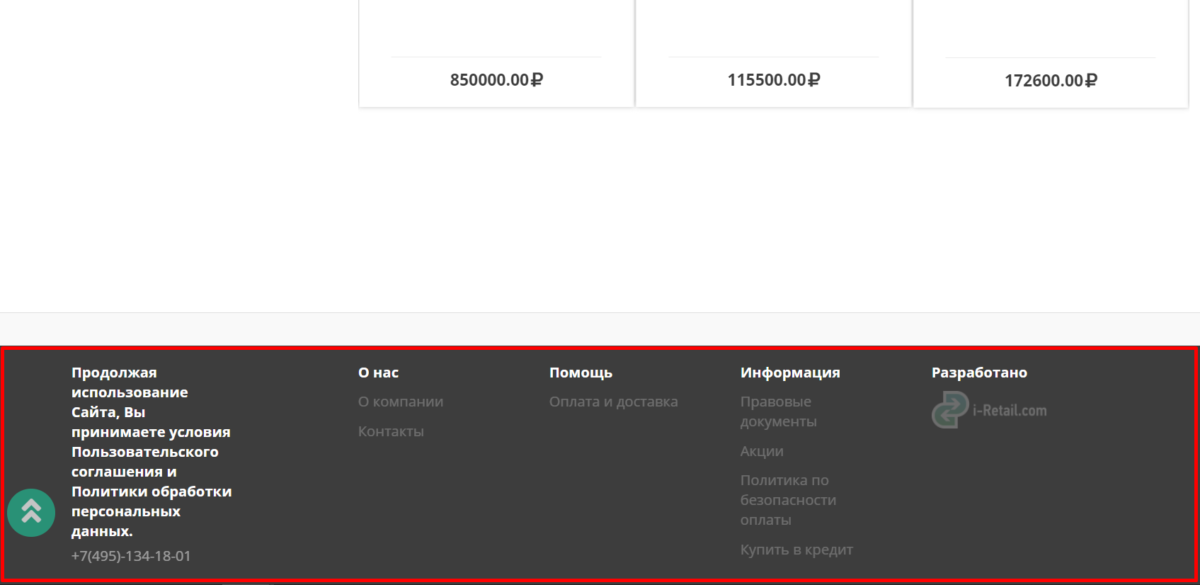
Pages
Any website consists of web pages – in the personal account, you can create, edit, rearrange pages, and add them to footer or header blocks.
At the beginning, website consists of several blocks that will help you present basic information and tell your customers about your company:
- About the company;
- Contacts;
- Payment and delivery;
- User agreement.
You can choose both which pages to display and their placement – some pages can be in the website’s footer, while the most important information can be in the header.
Creating pages
New pages are created using the “Add” button.

Content and Page Setup
Each page should have content, which can be text or images. You can also configure SEO settings, specify a link to the page, and provide a page title.

To add a page to the header of the website, enable the toggle switch for that page

To change the order of pages in the header, drag the desired page to the position you want and then click “Save.”

Pages in the footer are organized into blocks. There are a total of 3 blocks: “About,” “Help,” and “Information,” and you cannot change their names.

To add a page of the online store to the footer, select the footer block from the list where it will be located and then click “Save.” It’s not necessary to add all pages to the footer.
